Service Ports
Ordering a Service Port
To order a Service Port:
-
Navigate to the Services > Service Ports page and click the Order a Port button.
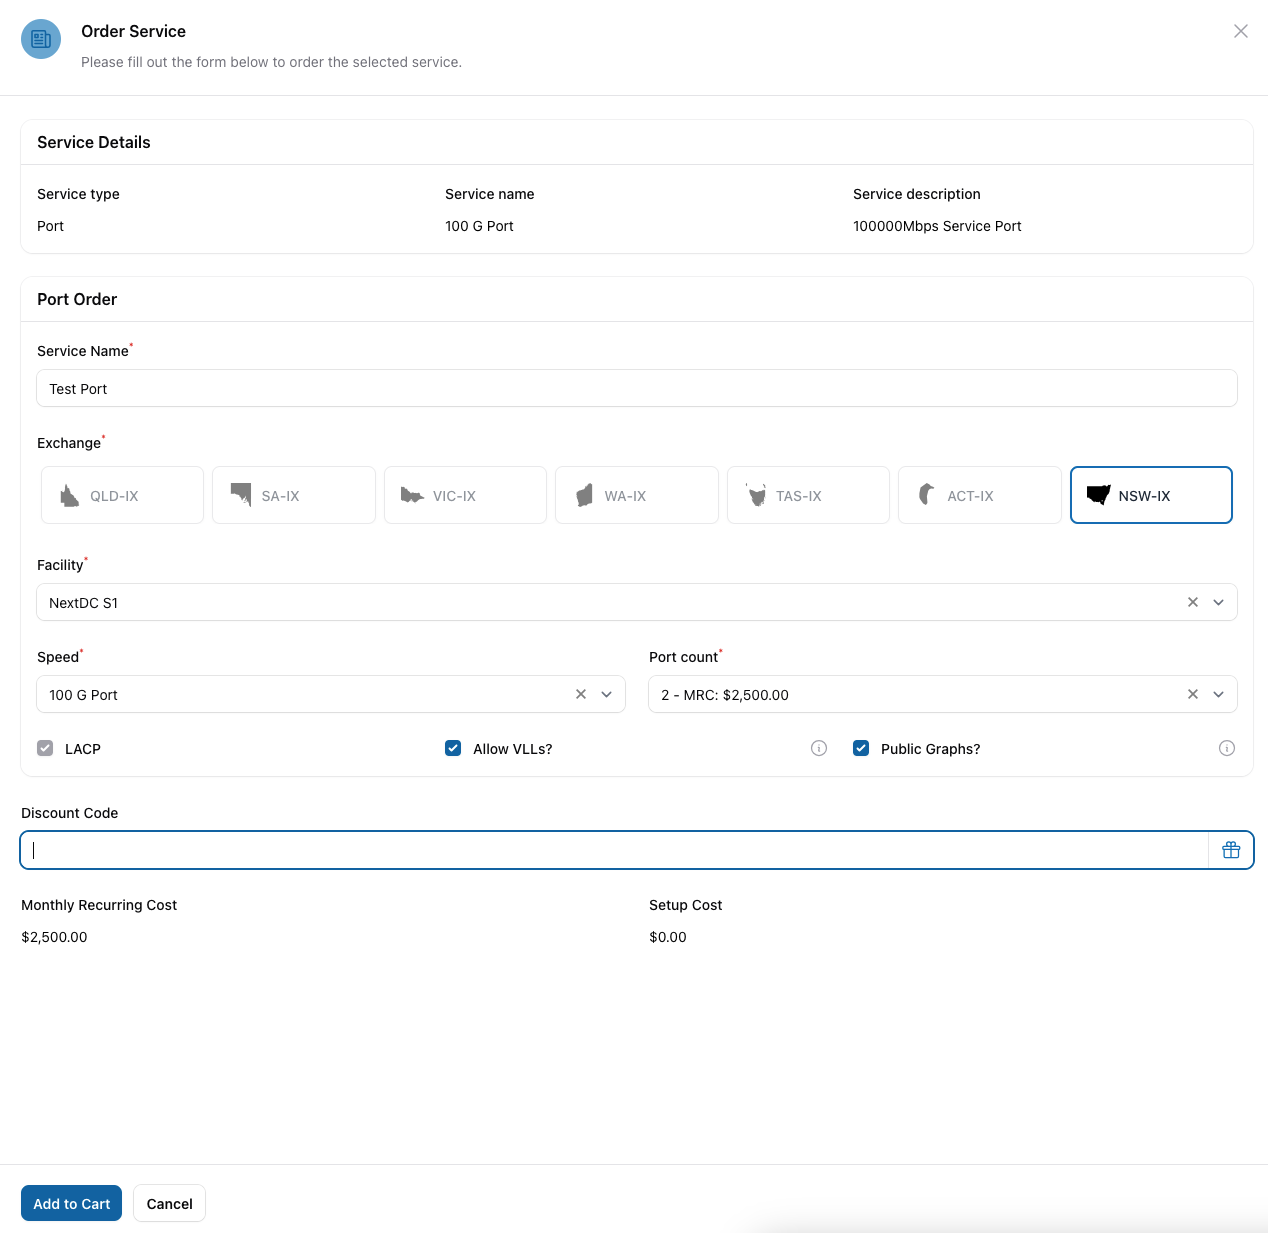
-
Use an internal reference as Your Port Name and select the relevant IX location.
- Select the Point of Presence location.
- Choose a Port Speed.
- Choose to allow or block VLL connections.
- Choose to enable LACP if required.
- Select the number of ports required at this location and selected speed.
- Click Order.
- If this is your first port order, you will be prompted to also order your first peering service. See Peering for more information on ordering a peering service.
- Your Port order will be added to the cart. Please see Ordering a new service for more information on completing your order and checking out the cart.
- Your Port details will be displayed showing a status of Allocating. Please review all the details by clicking View. If any changes are required, please withdraw your order and re-submit it with the correct details.
- You will receive an email confirmation of your order when it’s submitted and a second email when the order has been completed. The status will update within the Portal as your port order is being processed.
Downloading a LOA
Data centres usually require a letter of authority (LOA) from us when ordering a cross-connect to our demarcations. LOAs for each Service Port can be downloaded from the portal:
Note: LOAs are only available to download once resources have been allocated to the Service Port, this should happen automatically shortly after ordering the service.
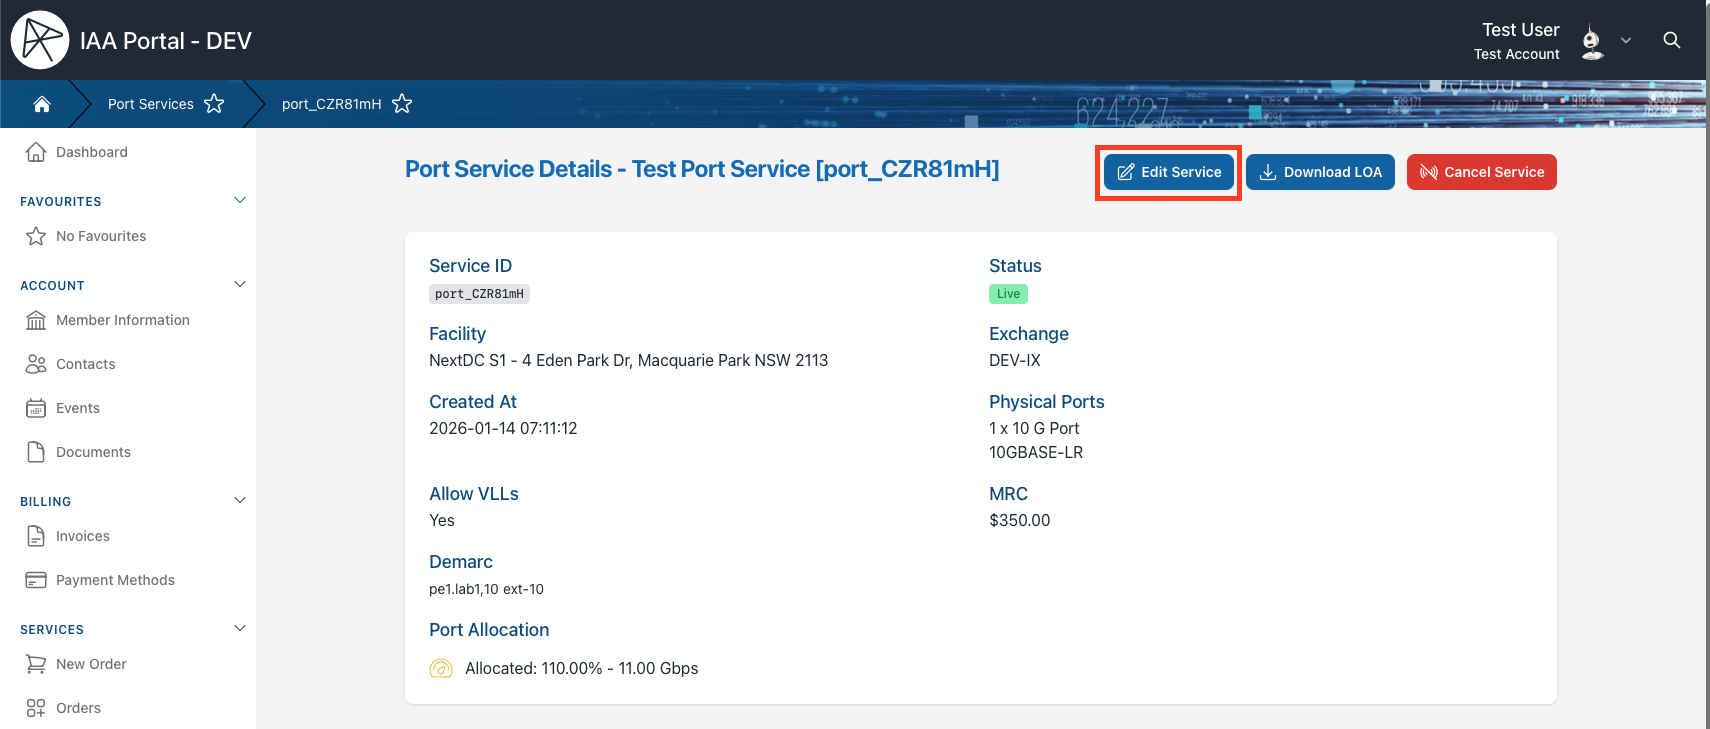
- Navigate to the Service Ports page and click View on the Service Port you wish to download a LOA for.
-
Click the Download LOA Button (next to the Port Service Details header):
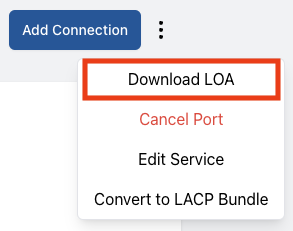
-
A PDF copy of the LOA will be downloaded to your computer.
Converting a Service Port to LACP
Link Aggregation Control Protocol (LACP) allows you to bundle multiple physical ports together to act as a single logical Service Port. To convert an existing Service Port to LACP:
- Navigate to the Services > Service Ports page and click View on the port you wish to convert to LACP.
-
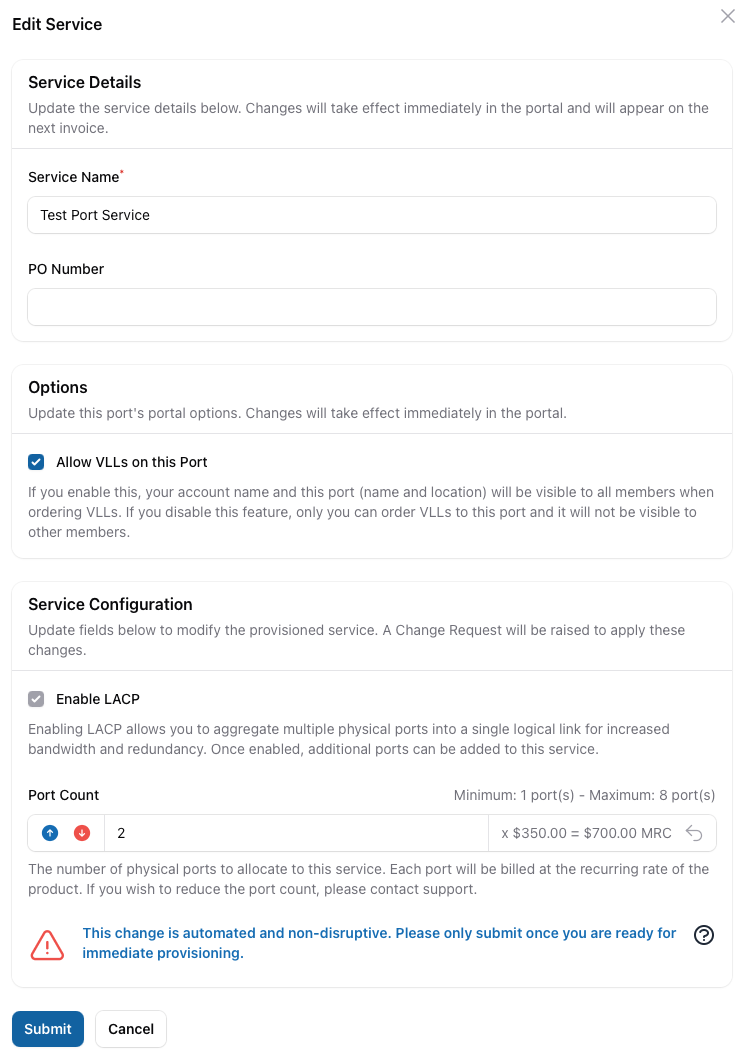
Click the Edit Service Button (next to the Port Service Details header):
-
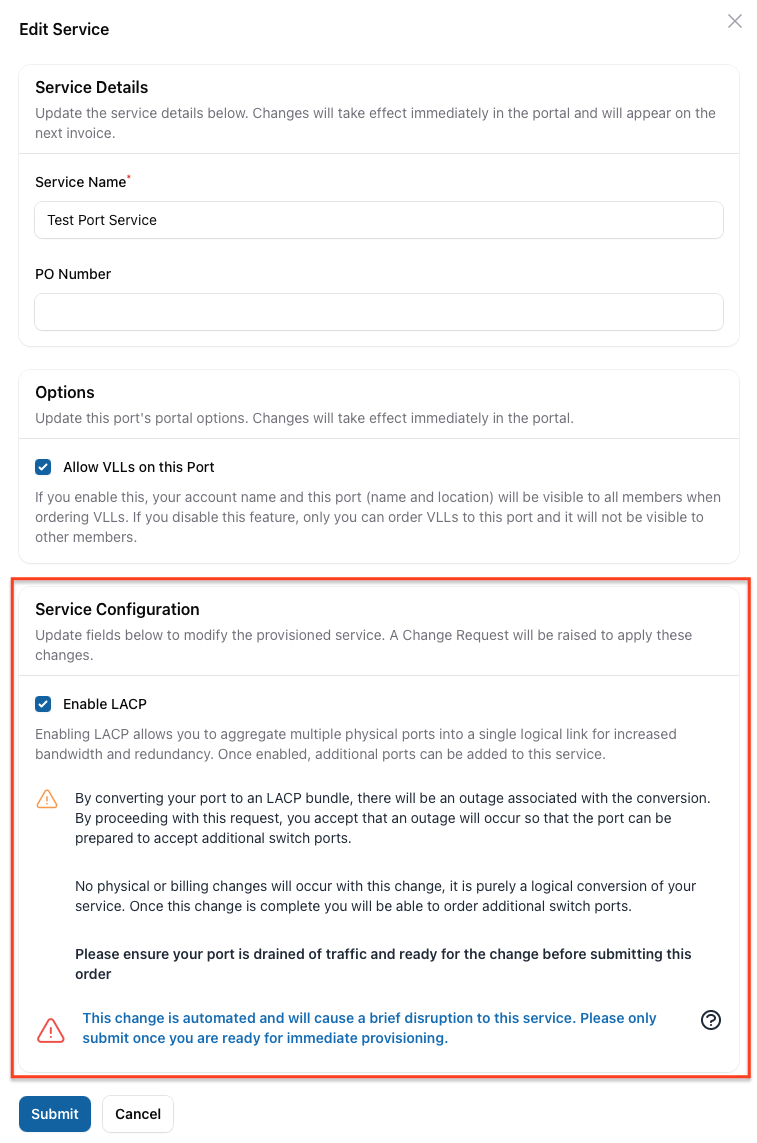
Within the Edit Service modal, under the "Service Configuration" section tick the "Enable LACP" checkbox. Please make note that this change is service impacting and will cause a short outage to the Service Port while the change is being processed.
-
Submit the Edit Service form, to submit the change:
-
The status of the Service Port will change to Change Request - Pending Approval, and a new Change Request will appear under Pending Changes:

-
Once the Change Request has been processed, the status of the Service Port will return to Live, and the Change Request will move to Completed Changes:

-
The Service Port will now be LACP enabled, and you can add physical ports to the bundle as required. Please see the next section for instructions on how to add physical ports to an LACP bundle.
Adding ports to LACP bundle
To add physical ports to an existing LACP bundle:
- Navigate to the Services > Service Ports page and click View on the LACP-enabled Service Port you wish to add physical ports to.
-
Click the Edit Service Button (next to the Port Service Details header):
-
Select the total number of physical ports you wish to have in the bundle:
-
Submit the Edit Service form, to submit the change:
-
A pending order will be created, whilst resources are being allocated for the additional physical port(s). You can click View on the pending order to see the details:

-
The status of the Service Port will change to Change Request - Pending Approval, and a new Change Request will appear under Pending Changes:

-
Once the Change Request has been processed, the status of the Service Port will return to Live, and the Change Request will move to Completed Changes:

Upgrading a Service Port Interface Speed
Self-service port speed upgrades are a multi-step process that requires ordering a new port at the higher speed, and then migrating your services across to the new port before cancelling the original port.
Important: Timing of Migration and Cancellation
If performed in a timely manner, the cancellation notice period of the original port will be waived and credit applied for the old port service from the date the new port is active.
Our ports are pre-patched and we deploy configuration immediately. To avoid overlapping charges please do not order unless you are ready, we will credit a maximum of 2-months of overlapping charges for an upgrade.
If there is a delay in migrating services across to the new port, the cancellation notice period may not be waived, and you may be charged for both ports until the cancellation is completed.
- Order a new Service Port at the higher speed, following the instructions in the Ordering a Service Port section above.
- You will receive a new LOA for the new port, please arrange the cross-connect with your data centre/supplier ASAP.
- Once the cross-connect is installed and the new port is active, you can migrate your services across to the new port. Please see the relevant service section for instructions on how to migrate each type of service:
- Once all services have been migrated to the new port, you can cancel the original port. Please see the Cancelling a Service Port section below for instructions on how to cancel a port.
- When cancelling the original port, be sure to select "Changing our IAA Services" as the reason for cancellation.
- Please also ensure you cancel the cross-connect with your data centre provider for the original port to avoid unnecessary cross-connect charges.
- After any port cancellation you will receive a cross-connect cancellation reminder, please ensure you raise a cancellation on your old cross-connect and click the link to acknowledge so we can re-use the port for other members.
- Contact support with the order details of the cancellation, to ensure the cancellation notice period is waived and credit applied from the date the new port is active.
Cancelling a Service Port
Note: If you cancel a service port that has active services, you will be required to cancel all services at the same time the port is cancelled.
To cancel a Service Port:
- Navigate to the Services > Service Ports page and click View on the port you wish to cancel.
-
Click the "Cancel Service" Button (next to the Port Service Details header):

-
Cancellation date will default to + 30 days in compliance with our cancellation policy.
- Please add any further information or notes that are required.
- Click Cancel Service.
- You will receive an email confirmation of your cancellation when it’s submitted and a second email when it has been completed. The status will update within the Portal as your port cancellation is being processed.